Not only am I obsessed with creating and making
art, I am constantly thinking about decorating.
I have always considered my studio space and the
rooms of my home as fodder for this hobby of mine.
Possibly to the chagrin of my husband, I am forever
moving and tweaking furniture, pictures, and other
decorative elements until I settle on that PERFECT
arrangement.

One of my very favorite ways to decorate is by
constructing vignettes or little areas of interest.
I LOVE LOVE tucking my nature findings and
various artworks into these little creative places
around the house. So I thought I would share
one of my latest studio vignettes and some tips
for creating your own perfectly decorated space.


"One of the easiest ways to add designer zing to your home
is to arrange objects into vignettes, or groupings, atop tables
and shelves. Think of it as creating a beautiful still life. You
can make a vignette on top of any flat surface: a dresser,
table, bookshelf, countertop or window ledge. You can use
accessories like vases, mirrors, plants, greenery, photos or
other personal belongings to create a mood, just like a movie
set designer does for a film. A vignette makes a room look
more polished and pulled together.
Here are eight tips for creating striking vignettes in your home:
1. Build your vignette around a light source.
If your arrangement of objects is in a dark corner, it won't be
seen and the effect will be lost. Try building your vignette
around a lamp.
2. Choose objects to support the style and theme of your room.
If your room is formal, a symmetrical design works best. If the
room is casual, asymmetrical groupings are better.
3. Use color in your vignette to coordinate a room.
Use items in shades that complement the dominant color in a
room. Silk flowers or artificial fruit are good ways to introduce
color into a grouping of items.
4. Display objects in odd numbers.
Place several objects of similar shape, size and color together
in odd numbers for maximum impact. Groups of three or five
work particularly well and are stronger visually than a group
of two or four.
5. Vary the height of the objects.
Use small pedestals to elevate items. Try stacking books to
create a platform for smaller objects.
6. Stick to a theme.
Group candles, for example, or family vacation photos. If the
vacation photos are from the beach, add a seashell.
7. Create depth.
Place objects from the back of the flat surface to the front
instead of in a straight line the length of the surface. Placing
objects atop a mirror, or leaning them against a mirror that's
on the wall, is an easy way to create a sense of dimension.
8. Vary the textures of objects.
Mix hard and shiny accessories with rough and natural. Use
weathered wood or iron architectural elements to introduce
an unexpected texture. Photo frames, which come in finishes
from shiny enamel to beaded, offer an array of texture options."
- This article found on the HGTV website









6 comments:
I always struggle pulling a vignette together, thanks for the great tips.
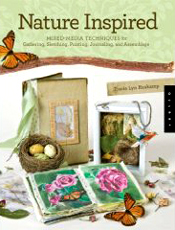
Lovely. And of course, everything goes well with a copy of your book :-) Can we see more of your house????
Oh that's great advice! Thank you Tracie!! I love your vignettes.
Great advice Tracie! Thank you for explaining all the tips and tricks that I struggle to figure out! Your vignettes are truly beautiful.
Someday, when my kids are old enough to not play with everything they see, maybe I'll be able to have some vignettes!! LOL.
And you are so good at it!! Thanks for passing along the tips.
See you soon at ArtUnravled!!
Post a Comment