
changing year are slowly occuring.
Unfortunately the scorching heat
cut short opportunities to really
savor the exiting season. So,
inspired by a beautiful stitched
apron from my mother-in-law,
and a longing to re-live those early
summer memories of lush flowering
blooms, I could not resist adding
some whimsy to the collar of this
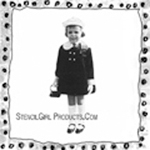
darling frock.
I invite you to create along with
me, as I demonstrate how to make
your own hand-painted floral iron-on.

1. Using a copyright free image or photograph,
transfer the image to a piece of typing/copy
paper via your computer and printer or a copier.

2. Cut a piece of 200-thread count bleach
muslin fabric slightly larger than the image,
and lay the fabric over the paper copy.
Using a light box and mechanical pencil,
trace the outline of the image onto the
fabric.

3. Take your favorite brand of acrylic
paints, and select colors that match the
picture then apply paint to the fabric,
remembering to wash your brush
thoroughly when changing to a new
color.
Don't worry about painting the details,
right away. First break the subject into
4 to 6 main colors and paint the entire
piece. Add in the details after you
have completed the base coat.

4. Once you finish painting the image,
take a pair of sharp scissors and carefully
cut a piece of STEAM-A-SEAM2, which is
a double stick fusible web.

5. Peal off one side of the wax paper
from the cut piece of STEAM-A-SEAM2.

6. Position the backside of the painted
artwork onto the sticky side of the fusible
web. Be sure to trim the excess STEAM-A
-SEAM2.
Follow the directions provided in your
package of STEAM-A - SEAM2 for
pressing the artwork and fusible web
together.
Don't forget to sandwich your project
between two pieces of parchment paper
to protect the art and the ironing surface.

7. Now that the STEAM-A-SEAM2 is
securely fastened to the back of the
art.
Cut the excess bleached muslin
canvas from the piece. Start by
trimming away the extra muslin
from any areas surrounded by paint.

8. Finish removing the remaining
excess bleached muslin canvas.

9. Peel off the remaining piece of wax paper
from the STEAM-A-SEAM2 that is attached
to trimmed artwork.

10. Position the hand-painted
artwork with sticky side down to
any surface that needs decorating.

11. Again, following the directions provided
in your package of STEAM-A - SEAM2
for pressing the hand-painted iron-on
artwork to the final surface.
And don't forget to sandwich your
project between two pieces of parchment
paper to protect the art and the ironing
surface.

Congratulations!.
You now have a lovely artful iron-on.


2 comments:
LOVE the addition to the apron!!
xoxox
love it! you and melly and alisa are quite the fashionistas!
Post a Comment