
plethora of birthdays and anniversaries
over the summer months. I have been
working on some artful sentiments
to send.
I invite you to create along with me,
as I demonstrate how to make your
own delicate hand-painted, butterfly
collage art card.

1. Using a copyright free image or photograph
of a butterfly, transfer the image to a piece
of typing/copy paper via your computer
and printer or a copier.

2. Cut a small piece of 200-thread count
bleach muslin fabric slightly larger than
the butterfly, and lay the fabric over the
image.

3. Using a mechanical pencil, trace the
outline of the butterfly onto the fabric.

4. Be sure to capture any important
details shown, such as the body or
large wing markings.

5. Using your favorite acrylic paints,
select colors that match the butterfly
image. Apply paint to the fabric,
remembering to wash your brush
thoroughly when changing to a new
color.

6. Once you finish painting your image,
take a pair of sharp, small scissors and
carefully cut the butterfly out.

7. Be sure to trim close enough to
remove all traces of the unpainted
bleached muslin fabric around the
outside of the wings and body.

8. Now gather a blank greeting card,
envelope, and miscellaneous collage
materials such as vintage papers,
lace, other fabrics.

9. Arrange the various collage materials
and attach to the front of the blank
greeting card using paste or double
stick tape.

10. Stitch your painted butterfly to
the collaged greeting card using
a needle and thread. One or two
stitches is enough to hold the
butterfly securely in place.

Congratulations!.
You now have a lovely artful card.
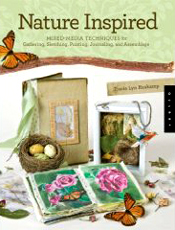
For additional tips and techniques,
check out pages 32-46 of my new book,
Nature Inspired.


11 comments:
so lovely, thank you!
What a gorgeous card and thanks for the tutorial...
Thank you, Tracie! Makes me want to give it another go! Your's are so,so pretty!
WHAT A WONDERFUL CARD. I'D LOVE TO RECEIVE A HOMEMADE PAINTED CARD LIKE THIS ONE,TELLING ME TO LOOK UP THAT THINGS WILL BE BETTER. IT PUT A SMILE ON MY FACE. SO PRETTY.
GRANNY FROM TAMPA
This is very sweet, indeed!
Thank you for sharing your tutorial :]
I'm sure anyone would appreciate such a beautiful homemade card!! thanks for sharing.
This card is so beautiful! Amazing! Thank you for the tutorial!
This is sooo beautiful. I am going to give it a try. My husband has a co-worker who is sick with cancer, this would be a lovely card for her. Thanks!
america57@comcast.net
so simple and beautiful! can't wait to try it.
That is lovely Tracie !
love ♥RINi♥
so so fabulous! You're the best for such a great tutorial!
Post a Comment