

I am a hopeless romantic, always believing in the fairy tale.. breathlessly waiting for the storybook ending.
Even though life can be tumultuous, I continue to gaze through rose colored glasses, off into the happily-ever-after sunset.
Even though life can be tumultuous, I continue to gaze through rose colored glasses, off into the happily-ever-after sunset.
Such feelings color my world, and jade my views. Love clouds my vision, and makes me believe in the power it has to fill the world with hope. These thoughts are only magnified by the fact that I am lucky enough to spend my days with a man I completely adore. I love not only telling my husband how much I love him, but also showing him.
With Valentine's Day just around the corner, I thought I would share this favorite tutorial for creating a unique custom message pillow, as a way to encourage and inspire others to show their love!

1. Cut one piece of fabric approximately 8" x 6".
Paint one side with Valspar Chalkboard Paint (found at Lowe's Hardware)
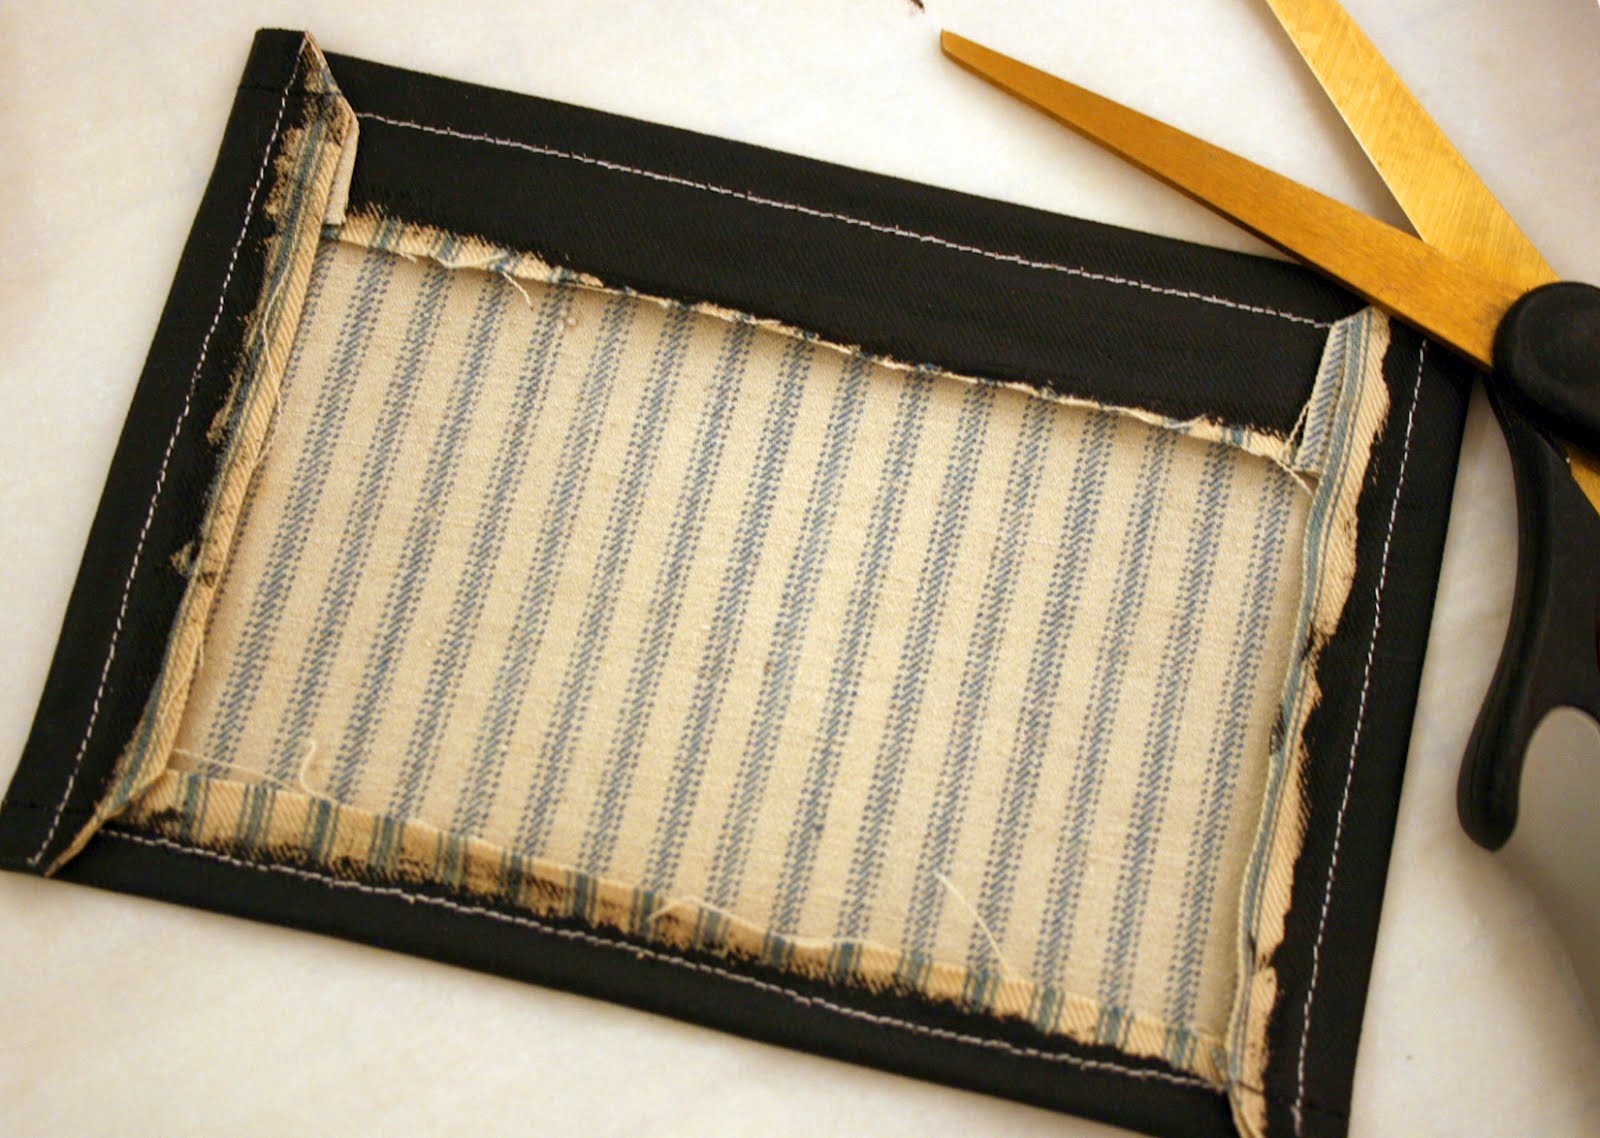
2. When the paint is dry, fold a 0.5" edge on all sides
and stitch in place to keep the fabric from unraveling.
Also. trim the corners at a diagonal to keep excess
fabric from showing. Be careful not to cut any stitches.

3. Cut two larger pieces of fabric approximately 14" x 10".

4. Stitch the painted chalkboard fabric (black side
up) to the right side of one of the larger fabric pieces.
Position the painted fabric vertically 2.5" from the
bottom and centered horizontally on the larger fabric.

5. Place the two right sides of the larger fabric pieces
together and stitch. Remember to leave an opening to
turn the fabric and for stuffing the pillow with batting.
Once the pillow is stuffed, sew the opening shut.

6. Write your message on the pocket with
chalk and clean with water.


No comments:
Post a Comment