Wednesday, December 19, 2012

A Holiday Tutorial: Make It Personal!

Through the month of December, I am devoting this blog to all tutorial posts. Some will be new ideas and others are favorites I have shared previously.  The Christmas holiday is a wonderful time for being creative.  My hope is that these projects will inspire some seasonal festive fun!

Looking for a last minute gift? How about making one that's personalized!

Create a message pillow...

Cut two pieces of fabric approximately 13" x 13".Paint one side of one of the pieces of fabric with white acrylic paint.

When the paint is dry, use a red and blue sharpie marker to draw lines across the white area of the fabric mimicking the look of a piece of notebook paper.

Select a favorite quote, poetry verse, perhaps a heartfelt message, and use a pencil to carefully write out the words on the blue lines. If you make a mistake then erase the pencil marks and start again. Once the message is written, use a black sharpie marker to trace over the pencil marks.

Place the two right sides of the fabric pieces together and stitch. Remember to leave an opening to turn the fabric and for stuffing the pillow with batting. Once the pillow is stuffed, sew the opening shut.

Saturday, December 15, 2012

A Holiday Tutorial: Brown Baggin' It!

Through the month of December, I am devoting this blog to all tutorial posts. Some will be new ideas and others are favorites I have shared previously.  The Christmas holiday is a wonderful time for being creative.  My hope is that these projects will inspire some seasonal festive fun!

During the year when I make a purchase from certain retailers, my items are wrapped in plain brown bags. I collect this type of packaging, as it is perfect for making  fabulous custom gift sacks for the Holidays!

Using a ruler and pencil, lightly draw stripes across the front of the bag.

Using Foil Leafing Adhesive, paint the stripes and allow them to dry until the glue is clear or tacky.
* I like Foil Leafing Adhesive because it dries quickly and is extra sticky.

 Carefully sprinkle glitter in the color of choice across the adhesive.

If doing varying stripes, apply the first glitter color, making sure to clean-up the excess before apply the second color, continuing this same application process until all adhesive is covered.

Happy Holidays!

Wednesday, December 12, 2012

A Holiday Tutorial: Wrapping It Up!


Through the month of December, I am devoting this blog to all tutorial posts. Some will be new ideas and others are favorites I have shared previously.  The Christmas holiday is a wonderful time for being creative.  My hope is that these projects will inspire some seasonal festive fun!


Just another idea for creating custom tags to adorn holiday gifts. Using remnant wrapping paper decorated with natural bits, you, too, can make the perfect accessory for any present.

Start with plain Shipping Tags that can be purchased from an Office Supply Store.

Glue the Shipping Tag to a remnant piece of wrapping paper, cutting away any excess.


Gather various natural elements from your outside surrounding. Remember worn and weathered elements are extremely beautiful and full of character!

Using aerosol hairspray lightly spritz the gathered bits of nature and sprinkle with a coating of fine iridescent glitter while wet.

Select coordinating ribbon or twine and other decorative components like burlap or buttons to use in the background.

Arrange and glue a glittery nature element with various other decorative components to each wrapping paper gift tag.

Attach beautifully decorated tags to presents.

Saturday, December 08, 2012

A Holiday Tutorial: Sparkle and Delight!


Through the month of December, I am devoting this blog to all tutorial posts. Some will be new ideas and others are favorites I have shared previously.  The Christmas holiday is a wonderful time for being creative.  My hope is that these projects will inspire some seasonal festive fun!


I love bringing bits of nature indoors. Especially at the holidays, such treasures add that extra sparkle to any holiday decor. And since Woodland Nature is a hot! decorating theme this year, I thought this vintage post would be such a lovely ode to the current trend.

Create this unique ornament from findings in your own yard or pinecones and dried flowers purchased from a local hobby/craft store.

Select varying sizes of pinecones.

Gather your favorite spray paint and glitter.

Cover the entire pinecone with paint.

While the paint is still wet sprinkle on glitter.

Allow the painted and glittered pinecone to dry.

Tie or glue your favorite color ribbon to the pinecone base.

Glue rose buds or other nature elements around the ribbon base.

Wednesday, December 05, 2012

A Holiday Tutorial: For The Smell Of It!

My Art Spark Friends and I are hosting a week of Special Holiday Tutorials!  I am the second of six participating in this event.

Like many of you, I own a lovely artificial Christmas tree. I greatly appreciate that it is easy to assemble and comes with little twinkle lights already strung on every branch.  Although I enjoy the convenience, there are a few negatives to using fake.  One of the qualities I miss in bringing a live evergreen into my home is the glorious smell!  There is something truly heavenly about having the aroma of pine wafting gently through the air.   

So today, I am excited to share this Holiday Tutorial with you, as a way to add that sweet tree scent or perhaps the scent of your choice, bringing back that lush fragrance coupled with a touch of decorative beauty to those, oh so wonderful, artificial trees.

Cut a piece of your favorite material.  
*I used a 6.5"H x 7.5"W fine woven linen fabric.


Using white acrylic for the background, roughly paint the fabric. Do not worry about creating a solid surface.

Once the fabric is dry, use a mechanical pencil to sketch some holly berries, leaves and a branch on top of the white background.

Paint the holly branch sketch with various colors of acrylic paint. Remember to add highlights and shadows to make the subject look more three-dimensional.

Once the fabric is dry, fold right sides together and stitch two sides, leaving one side open. Turn the stitched fabric inside out, to create a pocket. 

 Fill the stitched pocket with pine shavings, seasonal potpourri, or the scent of your choice. 
*I used lavendar buds from Apifera Farms.  It is the most fragrant and very long-lasting!!! 

Once the painted fabric pocket is filled with your scent of choice. Stitch the top closed.

Finally, stitch a decorative ribbon to the top, hang on the tree, and enjoy that wonderful smell!


Be Sure to Stop by these sites for More Holiday-Inspired Projects and Tutorial Joy!


Tuesday, Dec. 4th- Lyric Kinard - Snowflake Pinwheel Ornaments
Wednesday, Dec. 5th- Tracie Lyn Huskamp - For The Smell Of It! Ornaments
Thursday, Dec. 6th - Judy Perez - Speculatius St. Nicolas Cookies
Friday, Dec. 7th- Jill Berry - Mini Book Ornament
Saturday, Dec. 8th- Traci Bunkers - Star Garland
Sunday, Dec. 9th- Lisa Engelbrecht - Easy Gilded Letters for Cards


And I invite you to visit often because through the month of December I am devoting this blog to all tutorial posts. Some will be new ideas and others are favorites I have shared previously.  The Christmas holiday is a wonderful time for being creative.  My hope is that these projects will inspire some seasonal festive fun!

Saturday, December 01, 2012

A Holiday Tutorial: In Black And White!


Through the month of December, I am completely devoting this blog to tutorial posts. Some will be new ideas and others are favorites I have shared previously.  The Christmas holiday is a wonderful time for being creative.  My hope is that these projects will inspire some seasonal festive fun!

I absolutely LOVE this project!  This a great way to decorate packages by creating custom gift tags...

Start with a quart of Valspar Chalkboard Paint.
*Valspar paint can be found at Lowe's Hardware

Next gather several plain Shipping Tags that can be purchased from an Office Supply Store.

Remove the string from the Shipping Tag and gently peel off the top layer of the hole protector.

Using a Sponge Brush coat the Shipping Tag with two layers of Chalkboard Paint.
*The shipping tag curls when painted but flattens out after the paint has dried

After the Shipping Tag is thoroughly dry, apply a thick third coat of Chalkboard Paint.

Once the final coat is completely dry, re-tie the string onto the Shipping Tag and glue the peeled layer from the hole protector back in place. Now, the Chalkboard Tag is ready to use and reuse!

Monday, November 19, 2012

Tidings of Thanksgiving

Swift the passing days, each moment capturing a glimpse of the retreating Autumn.  Where has the time gone? Hours carried away, scattered by the unending Prairie winds.  And here we stand, on the cusp of another holiday.  

Very little will get done in the studio this week, as we are expecting company, which brings hearth and home to the forefront in preparation.  I don't mind... I don't mind a bit!  

This year Thanksgiving will be very different than Thanksgiving's past. It will be a quieter celebration, fewer souls to gather 'round... a result of an ever-changing family dynamic.  But this is life, and the constant challenge for each of us is the ability to embrace change.  

Today, I am grateful for a well-spring of wonderful holiday memories, and I eagerly anticipate a future of new moments shared with the ones I love.

*Just a few updates from the studio.... 
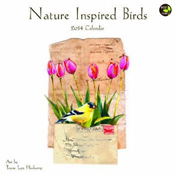
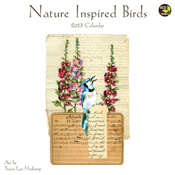
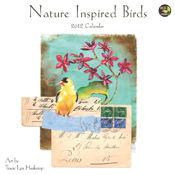
 - It has been a whirlwind of excitement, carefully packing and shipping all of my new 2013 Nature Inspired Birds Calendars.  I genuinely appreciate all who have supported me and my art!  There are only 14 Daily Planners left, and profits from remaining calendar sales will be donated to a Hurricane Sandy Relief Fund. I hope you will join me in helping those effected by this terrible storm.

*To purchase select the following link - Buy Calendars
(Once paid, your package will ship within the following 10 days via USPS Priority Mail)


- When you make a calendar purchase your name will automatically be entered in the drawing to WIN an Original Artwork!  The last day to enter this drawing will be Friday, November 30th.  A winner will be announced on Saturday, December 1st. 

- Finally, The Red Door Studio On-line Shops will close on Saturday, December 1st.  Please plan to make all purchase by Friday, November 30th.  The shops will  reopen in February with new and favorite treasures to buy!


Monday, October 29, 2012

WIN! A Red Door Studio Original Artwork


When you buy A Nature Inspired Birds Calendar, your name is entered to WIN the original collage artwork shown!

Daily Planner  are $16.00 each.  The planner starts in September 2012 and includes a total of 16 months. Each week has a "Notes", "To Do" and "Shopping List" spread, along with additional pages for measurement conversions, addresses, birthdays, events and more!

All calendar pages are printed on FSC certified paper with environmentally safe inks, making them both beautiful and eco-friendly.

Each order will come with a small special Limited Edition print. Daily Planners will be autographed, but Wall Calendars will only be autographed by request, as they come prepackaged in a protective plastic wrap.

*To Purchase select the follow link - Buy Calendar
(Once paid, your package will ship within the following 10 days via USPS Priority Mail)


* UPDATE: 11/2/12- MANY THANKS... ALL 2013 WALL CALENDARS ARE SOLD-OUT!